Your edges.
Your direction.
Guide edges with direction constraints. Lock an island’s position, rotation, scale or shape while working on the rest.
 ALPACA3D.
A DEDICATED UV EDITOR
Your UV workflow.
In one place.
Unwrap. Optimize. Pack.
Three steps. One focused workspace.
Define your seams.
Give your UVs their shape.
Refine the layout.
Keep control of the details.
Arrange your islands.
Make room in the UV tile.
THE WORKSPACE
Your mesh and its UVs, side by side.
Move between the big picture and the edges that matter.
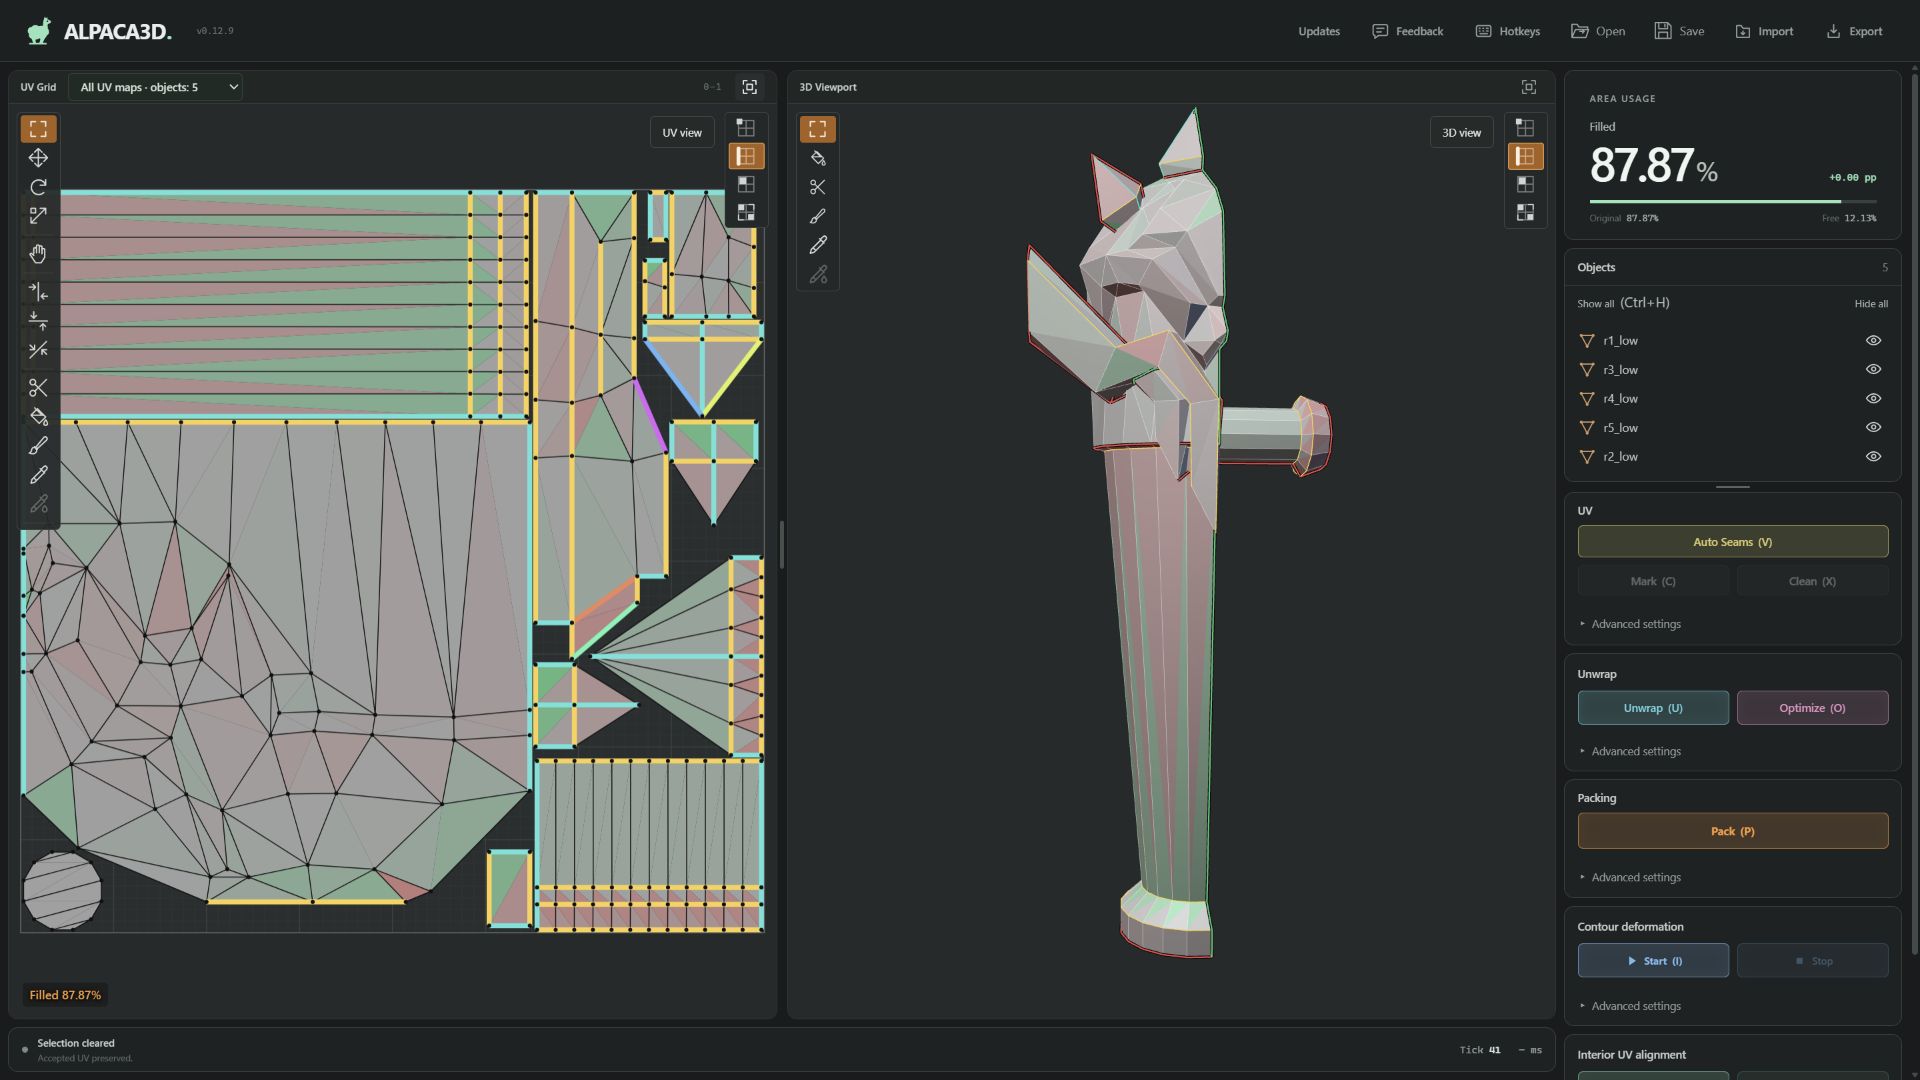
Guide edges with direction constraints. Lock an island’s position, rotation, scale or shape while working on the rest.
Build UVs from your seams, refine them with Optimize, then explore contour deformation and interior UV alignment.
Save your workspace as a project. Import binary FBX and export your edited UVs with the original 3D geometry preserved.
BLENDER BRIDGE
Send selected meshes from Blender to Alpaca3D. Work on your UVs, then return them to their source UV maps.
Get Alpaca3D with Blender Bridge BlenderAlpaca3D.
Start in Blender’s Object Mode.
The Bridge add-on is included with the Windows installer.
YOUR NEXT UV STARTS HERE
Alpaca3D v0.12.11 / Windows x64
Same application. Both work offline after installation.
The Windows installers are not yet publisher-signed with Authenticode. Windows may show an unknown-publisher prompt.
A FEW DETAILS
No. Unwrap, Optimize and Pack work inside Alpaca3D. Import a binary FBX file to get started. Blender is needed only when using the optional Bridge workflow.
Install the add-on from the Blender Bridge folder included with Alpaca3D, and select the installed Alpaca3D application in its settings. In Blender Object Mode, select meshes with an active UV map and send them to Alpaca3D. Return the edited UVs to the source maps when ready.
Import and export binary FBX (7000+), or save a JSON project to continue editing later. Packing uses the 0–1 UV tile; UDIM and ASCII FBX are not supported.